This time round I'll will emphasise on the aesthetic work...But within reasonable degree of form-follow-function.
Like any projects in life, embarking on a project without laying down the goals is a sin...
Hence, a list of objectives in the order of priority
1) Quality finishing & Aesthetically appealing. Good enough to go on a display shelve.
2) All components must be from my junk pile.
3) Class II electrical safety compliance (double insulated form user)
4) Complete the project within 80 man hours
5) A project even a 12year old can complete.
Now the path is laid, one can start to eat the elephant a bite at a time...
DECISIONS, DECISIONS, DECISIONS...
Designing from scratch is fun but you are committed to a total unknown out come... Hence, this time, one gotta let go for one's ego for the better & use a trial & proven circuit.
Amplifier Design
A quick summary on Aikido. It is created by John Broskie. Requires 4 triode per channel to work, & the common practice is to use dual triode envelope valve, such as 12AX7, ECC88, 6N1P, ECC81, 6SN7... etc etc.
Aikido is such that it is almost immune to whatever tube selection or operating point (within common sense limits of course), it will produce fantastic audio result disregard. The only decision you will have to make is what sort of gain you need & what sort of output impedance you require... Spooky... :) To cut all the theory, I'll just say distortion cancellation is at work in this design...
Also, this amp is death quiet! It also design for power supply ripple cancellation!

I had built a myriad of Aikido pre-amps even using it as the driving stage of my 2A3 SE DHT with various tubes combinations & operation conditions; Construct using point-to-point construction technique, some uses bus bar ground & some using ground plane.
Sonic quality is fantastic, the image actually defy physical boundary & literally extends outside of the room! Neutral, dynamic & great micro-details are really high on the top echelon equipments.
Form of Construction
This is a solid design. Unfortunately, collect all the parts & construction from scratch will eat up the 80 man hour budget... even cutting my own PCB is out of the question...
I bought a few kits in return for John Broskie's generously sharing his work freely. This will be the best time to put them to their intended purpose.
This will be the second kit I build since I took the DIY path, the other kit was my inaugurate tube project which is a 6EW7 Kit from audiohobbyist many winters ago... And you guess right, the 6EW7 didn't survive my relentless hacking & eventually fell into pieces... Hope this Aikido will have better luck...
Tube Choice
6SN7 is the tube of choice, it can yield a gain near 10 & & when running this circuit at 300V & 7.2mA per tube we can have a super low Zo of 685ohm; Its perfect for a line stage & even also an great headphone amp!
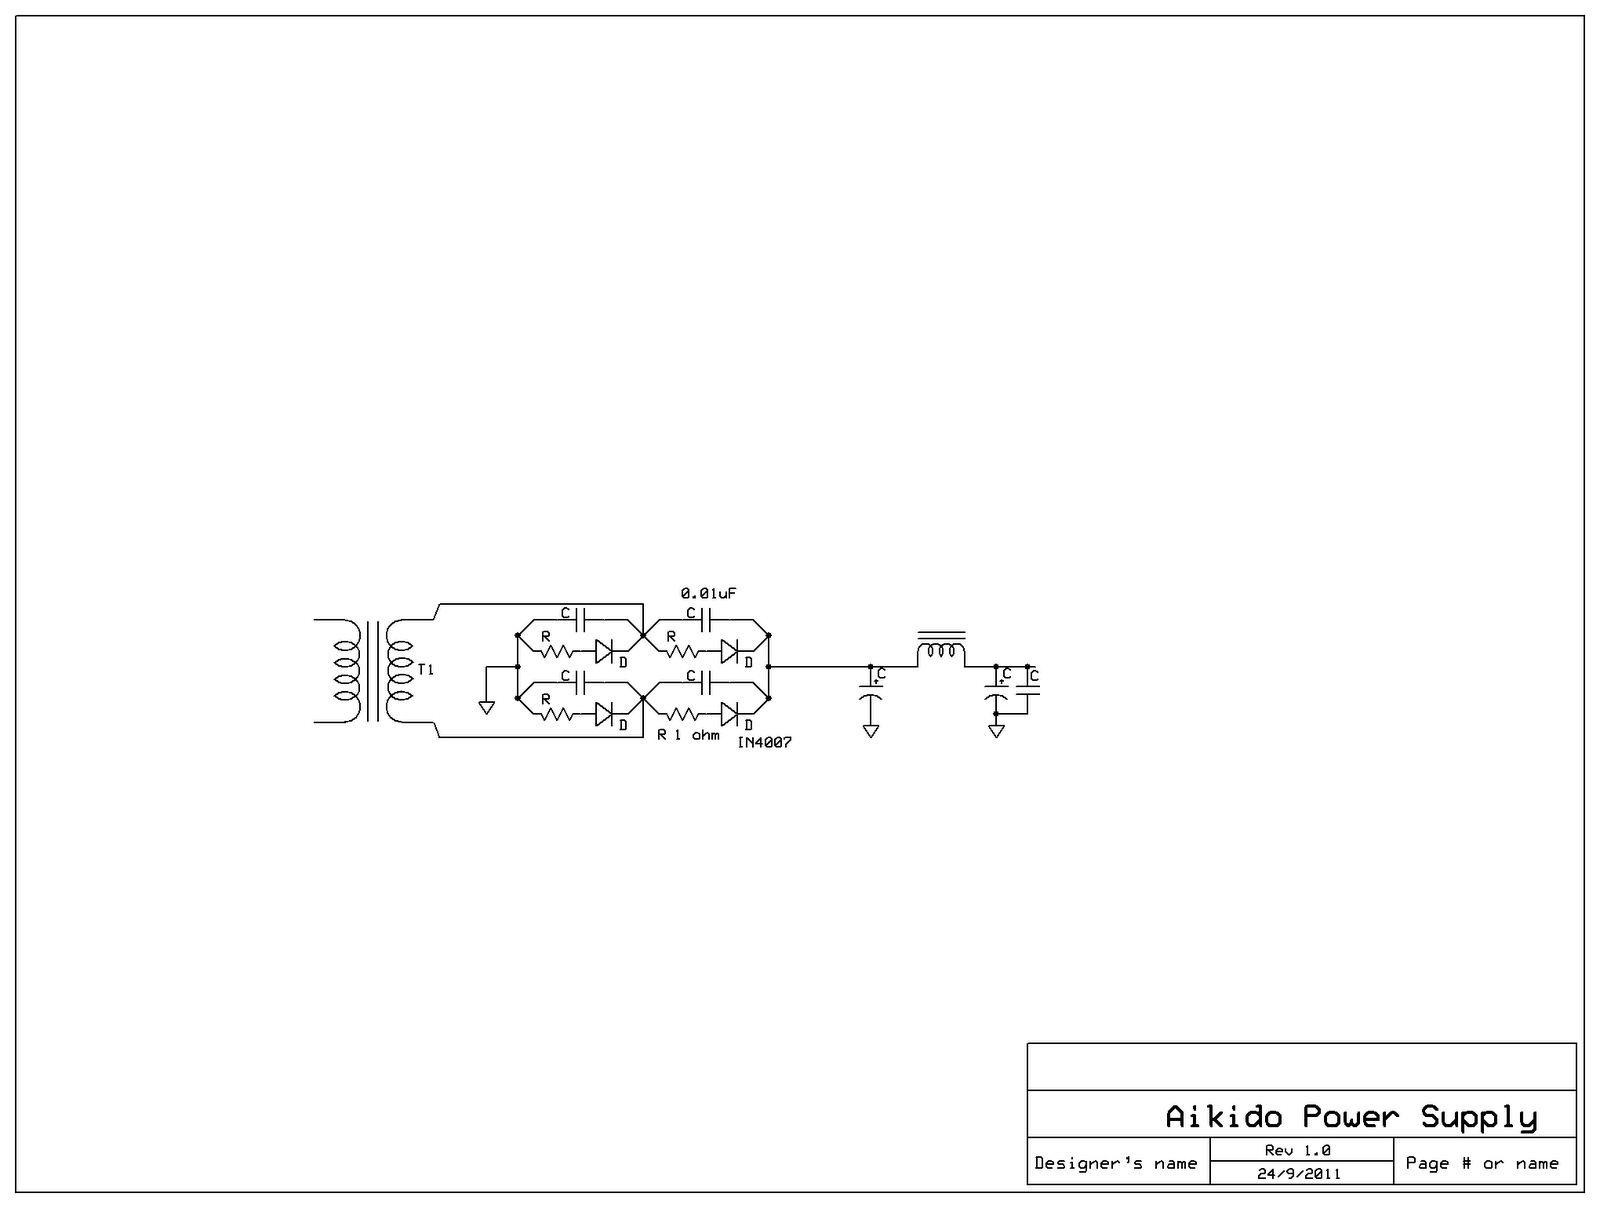
Power Supply Considerations
The kit has all the bells & whistles but you gotta build your own power supply.
6SN7 will work safely with 250V on the anode & when stacking 2 6SN7 it can safely use 500V B+ but since I have a few isolation transformers lying around, it will by default using B+ of 300~325V. Aikido is designed to have superb PSRR by design, but it helps with a solid & well filtered power supply.
I'll use the following power supply topology which I got repeated good results in the past. It sounds really close to a tube rectifier power supply.
That concludes the first 2 hour of work on this project.
Next 2 hours is to is to get things organised.

 A quick stock check of the kit.
Never proceed without this very crucial piece stow box!
 One must have a large enough stow box for stowing you project between play time...
This IMHO is the bare minimum size10"x13"x8"deep, & it comes with lid & rollers too :)
 No blog is not complete without eye candy
.........PART 2 preview .........
In my next post, I'll spend time on the chassis.
YoBit lets you to claim FREE CRYPTO-COINS from over 100 unique crypto-currencies, you complete a captcha once and claim as much as coins you want from the available offers.
ReplyDeleteAfter you make about 20-30 claims, you complete the captcha and resume claiming.
You can press CLAIM as many times as 30 times per one captcha.
The coins will held in your account, and you can convert them to Bitcoins or USD.